In this article:
1. Feature Description
2. Setup
3. Starting a Collection
4. Options
5. Collection Review & Editing
6. Publishing to NSX
7. Activate Rules (Optional)
Feature Description The ReSTNSX vRealize Network Insight – vRNI – Flow Analyzer is the only easy way to collect raw IP flow data for the creation of NSX dFW Firewall rules. The collection is based upon IPFIX flows collected by vRNI where each unique flow is displayed for manipulation before directly publishing to dFW.
Minimum Release: 3.1
Application: NSX-v, NSX T, VMCoAWS
License: Enterprise
Privilege level: Audit (view); Security Engineer or higher (create/edit)
Setup To top
A vRNI platform VM or VMC Cloud instance must be active as a ReSTNSX Data Source.
ℹ️ Adding data sources require Enterprise Administrator privileges
Starting a Collection To top
To start a new flow collection or to review an existing, navigate to Tools > Security Planning > vRNI Flow Analyzer.
Clicking the green plus (add Flows) on the dashboard will open a window where the vRNI options are selected.

Options: To top
vCenter Cluster – a list of Clusters as discovered by vRNI as the source for collecting flows
Max Results – The number of flows to return. Options range from 100 to 10,000
Traffic Type – flow direction as defined by vRNI. Options include North-South and East-West
Auto combine like – Optional selection that will combine like flows where they share the same destination, destination services or source. For example, instead of creating two rules that share a common IP destination, ReSTNSX will combine the flows as a single entry with two sources and a single destination
Date Range – vRNI supports up to 30 days of history for flows. Narrow the range of days for the flow collection to limit the flow records.
Filters / Exclusions – a series of criteria that can be set to filter out certain flow types (sources, destinations, ports) that are not needed for rule creation. Maximum of 5 criteria is supported. Current supported filters for inclusion and exclusion are IP, Security Group, VM, VLAN and VXLAN.

Clicking Analyzing Flows will initiate an API connection to vRNI. The job is performed in the background where users can navigate away from the collection dashboard if the task is analyzing a large amount of flows.
Collection Review & Editing To top
Once a collection is complete, click the magnifying glass on the dashboard for a given flow set to see the results.
The results page is broken into two sections. The upper section is a summary of the data collected with a summary of any optimizations that were made using the Auto Combine feature for rule consolidation. Additionally, the exclusions list is presented.

The bottom section shows a sequential list of flows discovered from vRNI and any rule optimizations (combinations) that were performed on the users behalf. Additional tasks can be performed prior to publish, including:
Convert Source and Destinations to VM Name/ID – Select one or more rules to resolve the discovered IP address to a VM Name to be used in the rule criteria. This will set the source and/or destination to use the VM-ID vs the raw IP address.
ℹ️ Name resolutions are made against the active NSX Manager Data Source in ReSTNSX, not the selected Cluster from the collection.

Convert IP Addresses to IP Sets – Select one or more rows to convert source and destination criteria to an IP Set. Alternatively, an individual rule source or destination can converted to an IP Set by clicking the dual arrow (collapse) icon. The IP Set can be reverted to raw IP by clicking the dual arrow (expand) icon.
The IP Set name is autogenerated but can be changed by clicking on the name.
ℹ️ The IP Set will not be created until the rule set is published to NSX

Convert IP Addresses to Security Groups – Select one or more rows to convert source and destination criteria to a Security Group. The Security Group can use raw IP as criteria (members) or users can select existing Security Groups to use vs creating new.
Combine Rules – Additional rule consolidation can be achieved in the flow grid by either selecting the desired rules and Merge Selected Rows from the main menu. This action will combine all the selected rows, regardless of the source, destination or destination port. Alternatively, users can drag and drop a rule onto each other to combine
ℹ️ When combining occurs, the grid is re-indexed. Prior to combining, please note the rule name to easily locate it after combining.
ℹ️ All changes are saved to the ReSTNSX database. You may leave this screen and return later to further edit and/or publish to NSX
Publishing to NSX To top
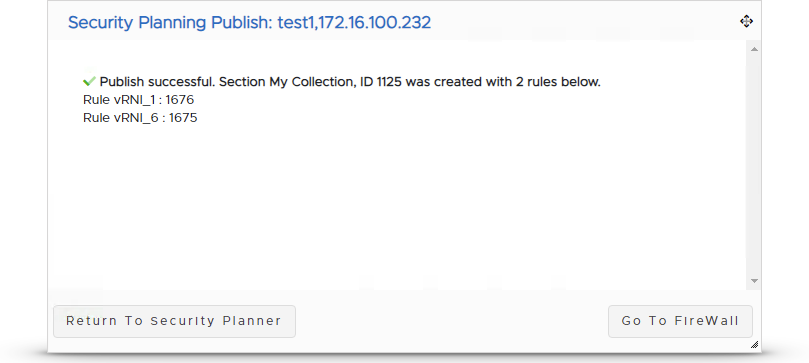
Once all the edits are completed, select one or more rules to publish to NSX and click the Publish Selected Rules to NSX. This action will open a new window with verbose progress status of creating the dFW Section, Rules and associated objects on the active NSX Manager Data Source.
ℹ️ A new section will be created at the top of the dFW section list. The section name will reflect the name of the flow collection by default.


To validate, navigate to Operations > Distributed Firewall and the new section will be present in the order displayed on the flow collection page. Any supporting objects (IP Sets, etc…) were also created and associated to the rules.
ℹ️ While the new section is published on the destination NSX Manager, ALL rules are disabled

And query to validate the supporting objects were created with the correct members:

Activate Rules (Optional) To top
Once the rules are published to NSX, the rules can be further edited or re-ordered before activating. Within the ReSTNSX dFW Operations page, select one or more rules to activate (enable), click Enable Selected from the Section Menu and Publish Changes. The rules are now live on NSX – enforcing the policy derived from the vRNI flows.

Comments